Basic Granny Square Crochet Pattern
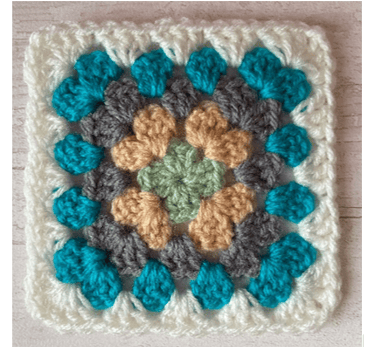
There are many different ways to make a granny square and most people find a method that works best for them and develop their own preference. The instructions below are how I create my granny squares. I’ve been creating these particular squares for a while now alongside other projects, as part of a larger project. I’ve used five rounds in my squares all different colours, but you can use more or less rounds and colours, whatever you prefer.
What You Will Need
I’ve used DK yarn and a 3.75mm crochet hook but you can use whatever you have to hand. Make sure the crochet hook size is the correct one for the yarn you are using.
Scissors
Yarn needle (to weave in yarn ends)
Measurements
The actual size of your granny square will depend on your crochet (how tightly you crochet) and the yarn and crochet hook used. As a guide my granny squares are approximately 11cm x 11cm square.
Stitches and Abbreviations
This pattern uses UK crochet terms throughout.
ch – chain stitch
rs – right side
sl-st – slip stitch
sts – stitches
tr – treble crochet
ws – wrong side
yoh – yarn over hook
Notes
The granny square is made using treble crochet clusters of three tr stitches.
One chain is used between the corner clusters only. No chains are used between the side clusters.
A slip stitch is used to join at the end of each round.
The granny square is turned at the end of each round.
You can make this granny square in one colour or change the colour for each round by cutting the working yarn and fastening off after the slip stitch at the end of each round and re-joining a new colour.
Treble Crochet Stitch
Yoh and insert hook into stitch, yoh, draw through stitch (3 loops on hook), yoh and draw through 2 loops on the hook, yoh and draw through remaining 2 loops on the hook.
Pattern
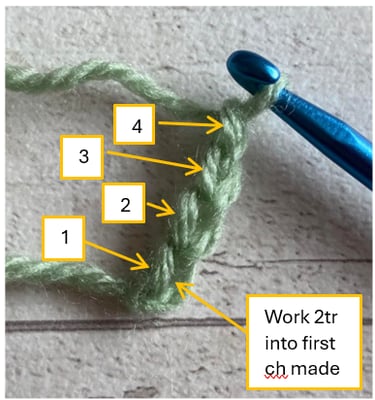
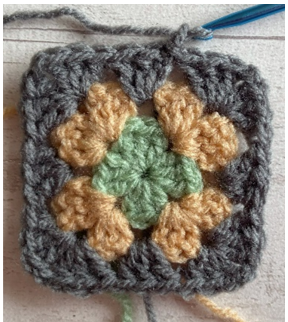
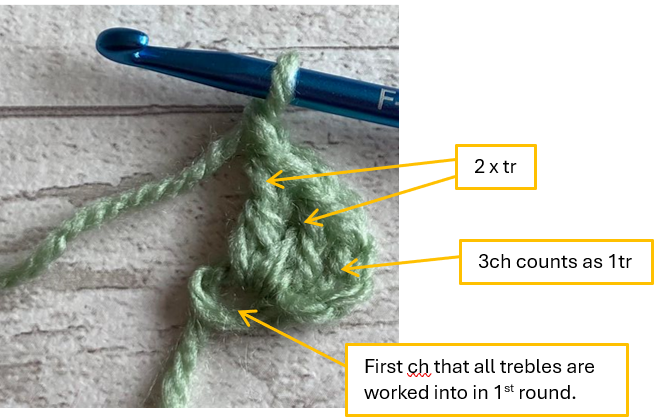
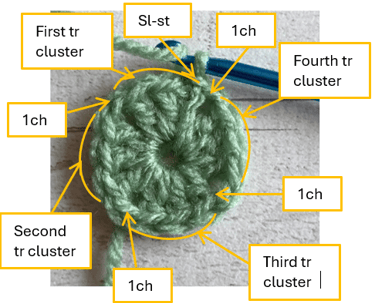
Round 1: Ch4 then working into the first ch made, work 2tr (if you are using a magic ring, ch3 and then work 2tr into the ring).
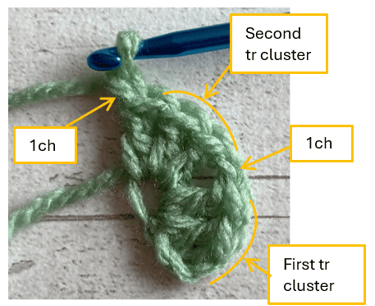
Next ch1, then work 3tr, ch1. Repeat from to 2 more times. Sl-st to the top stitch of the beginning chain to join. Cut yarn and pull through stitch to fasten off.
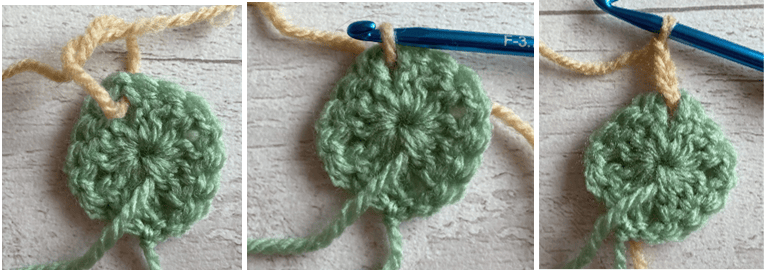
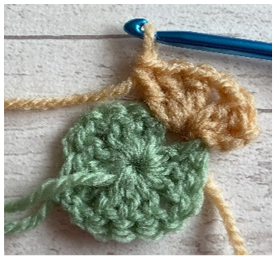
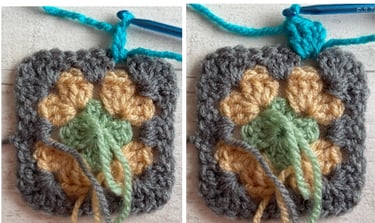
Round 2: Turn work and join new yarn colour into any ch1 space from round 1. I tie the new colour in place (to make sure it's secure) and then pull through a loop onto my hook by pulling the working yarn from back to front. Ch3 (this counts as 1tr).
In the same ch1 space work 2tr, ch1, 3tr. This forms the first corner of the round.
In the next ch1 space work 3tr, ch1, 3tr. Repeat from to 2 times more. Sl-st to the top stitch of the beginning chain to join. Cut yarn and pull through stitch to fasten off.
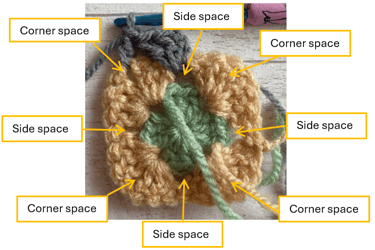
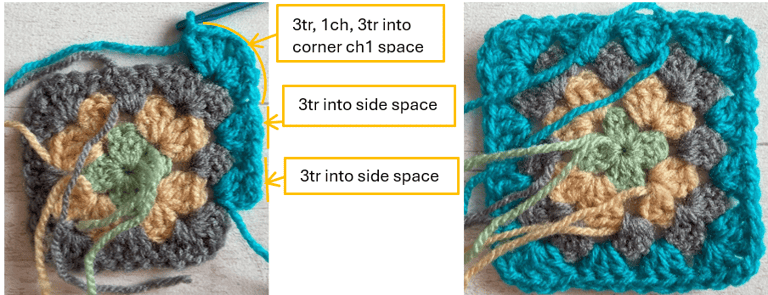
Round 3: Turn work and join new yarn colour into any of the side spaces from round 2. Pull through a loop and ch3 (this counts as 1tr). In the same ch1 space work 2tr. Move to the next corner ch1space and work 3tr, 1ch, 3tr.
Move to the next side space and work 3tr, move to the next corner ch1space and work 3tr, 1ch, 3tr. Repeat from to 2 times more. Sl-st to the top stitch of the beginning chain to join. Cut yarn and pull through stitch to fasten off.
Round 4: Turn work and join new yarn colour into any of the side spaces from round 3. Pull through a loop and ch3 (this counts as 1tr). In the same space work 2tr.
Continue around working 3tr into each side space and 3tr, 1ch, 3tr into each corner ch1 space. Sl-st to the top stitch of the beginning chain to join. Cut yarn and pull through stitch to fasten off.
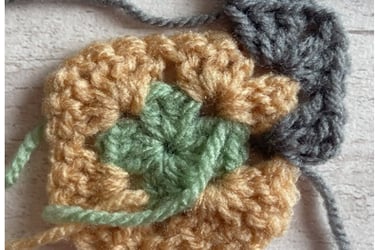
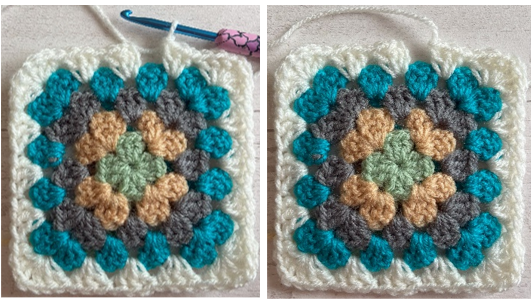
Round 5: Turn work and join new yarn colour into any of the side spaces from round 4. Pull through a loop and ch3 (this counts as 1tr). In the same space work 2tr. Continue around working 3tr into each side space and 3tr, 1ch, 3tr into each corner ch1 space.
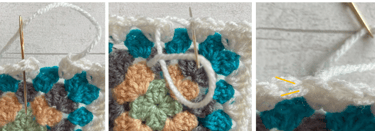
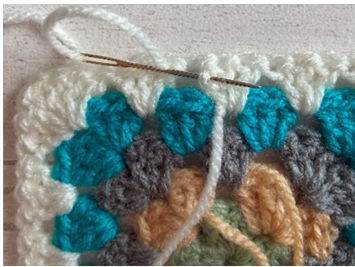
On the last round you can slip stitch to join or, for a neater finish, cut the yarn and pull through the last stitch. With a needle, insert the yarn from the back to front of the top of the first tr in the round (ignoring the ch3 from the start of the round).
Insert the needle into the back loop of the last stitch of the round and pull yarn through to form a fake stitch.
On the back, insert the needle through the stem of the beginning chain.
Weave in all ends.
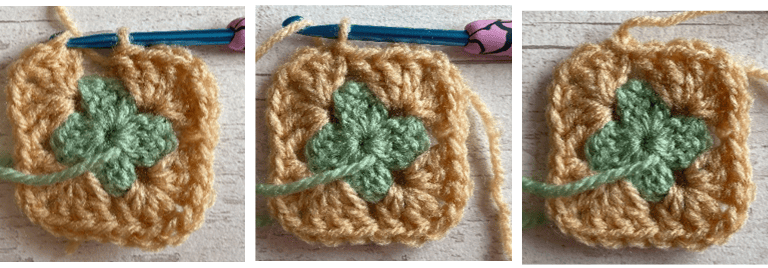
Your granny square is complete! I hope you enjoyed this project and found the pattern easy to follow. I would love to see your finished squares, so share a picture on social media by tagging @scattiecrochet. If you have any questions or suggestions, please feel free to email me at scattiecrochet@yahoo.com
