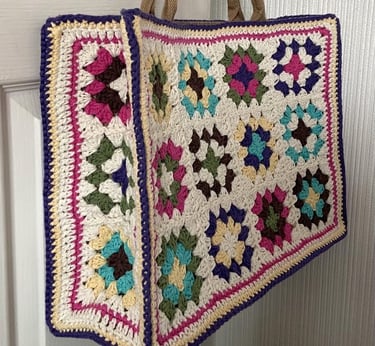
Written in UK terms, this Granny Square Bag crochet pattern uses double (dc) and treble (tr) crochet stitches throughout. The US terminology equivalents are single (sc) and double (dc) crochet stitches respectively. See the conversion table of UK and US terms here.
You will need to be familiar with making a ‘Magic Ring’ and the ‘Join as You Go’ method for joining Granny Squares. The bag is made in panels which are joined together to fit around and attach to a hessian shopping bag, to ensure the bag holds its shape and is robust enough for use.
Create this Granny Square Bag in a rainbow of colours or any colour palette of your choosing. This makes a beautiful gift bag as well as a practical shopping or storage bag.
Copyright Scattie Crochet. All rights reserved. This crochet pattern and images/pictures are the property of Sarah Catterall at Scattie Crochet. Please do not redistribute, copy, alter, or sell the pattern or claim this pattern as your own. The Granny Square Bag you make following this pattern is yours and you are free to sell it, it would be appreciated if you would credit Scattie Crochet in your listing.
What You Will Need
Sugar n Cream 100% cotton, aran weight yarn, 70.9g (109m) balls. My bag used a total of 454g of yarn in the following colours:
Ecru 00004 (3 balls), Grape 00071 (1 ball), Country Yellow 01612 (1 ball), Warm Brown 01130 (1 ball), Sea Breeze 01201 (1 ball), Sage Green 00084 (1 ball), Hot Pink 01740 (1 ball).
Hook size 4mm (G-6)
Scissors
Yarn needle (to weave in yarn ends)
Hot glue gun
Sewing needle and thread
Hessian bag. My bag was from The Range and measured 44cm wide x 33cm long x 16cm deep (excluding handles)
Measurements
The actual size of your bag will depend on the size of your hessian or jute bag.
Stitches and Abbreviations
This pattern uses UK crochet terms throughout. Click here for a conversion table of UK and US terms.
ch – chain
dc – double crochet
mr – magic ring
rs – right side
sk – skip
Sl-st – slip stitch
tr – treble crochet
sts - stitches
ws – wrong side
yoh – yarn over hook
Double Crochet Stitch
Insert hook into the stitch, yoh, draw through stitch (2 loops on hook), yoh and draw through both loops on hook.
Treble Crochet Stitch
Yoh, insert hook into the stitch, yoh, draw through stitch (3 loops on hook), yoh and draw through 2 loops on hook. Yoh and draw through remaining 2 loops on hook.

PATTERN
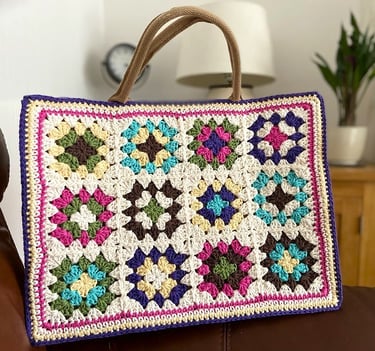
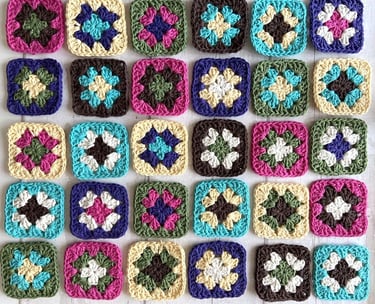
The number of granny squares required will depend on the size of your bag insert. For my insert size I used a total of 30 granny squares (12 each for the front and back panels and 3 each for the side panels). Remember to allow for the ‘Join As You Go’ (JAYG) round when calculating the number of granny squares needed.
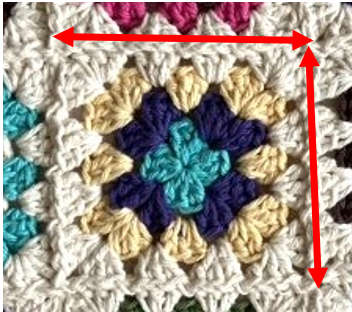
My granny squares plus the JAYG round (ecru colour) were approximately 10cm x 10cm each:


GRANNY SQUARES
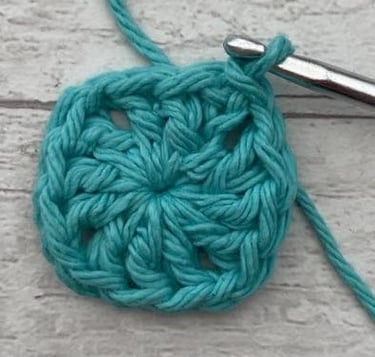
Three rounds are used for each granny square starting with a mr.
Round 1 Using yarn colour of your choice and a 4mm hook, make a mr and ch3 (counts as 1tr), then create 2tr, ch1, 3tr, ch1, 3tr, ch1, 3tr, ch1. Then join with a sl-st to the top of the ch3 from the beginning of the round. Fasten off and cut yarn leaving enough to weave in end.
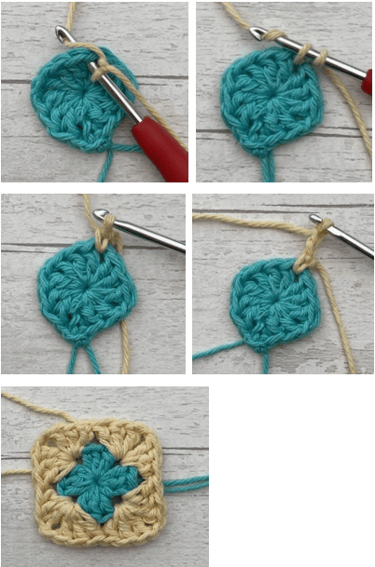
Round 2 Using yarn colour of your choice, make a slip knot on your hook. Insert hook into any ch1 space, yoh and pull up a loop through the ch1 space (2 loops on hook), yoh and pull through both loops, then ch2 (counts as 1tr). Next, 2tr, 1ch, 3tr to complete the first corner. Then (move to next ch space and 3tr, 1ch, 3tr) x3. Sl-st join to the top of the ch2 from the beginning of the round.
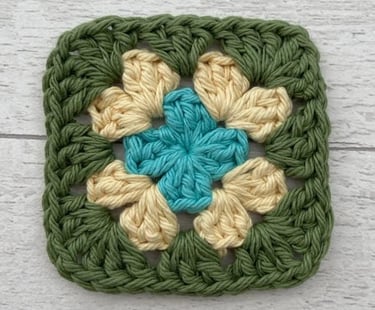
Round 3 Using yarn colour of your choice, make a slip knot on your hook. Insert hook into any ch1 corner space, yoh and pull up a loop through the ch1 space (2 loops on hook), yoh and pull through both loops, then ch2 (counts as 1tr). Next, 2tr, 1ch, 3tr to complete the first corner.
(Move to next space and work 3tr. Then move to next ch1 corner space and work 3tr, 1ch, 3tr) x3.
Move to the last space and work 3tr. Sl-st join to the top of the ch2 from the beginning of the round.
Fasten off, cut yarn and weave in all ends.
Once you have made enough granny squares for all the sides of your bag, use the JAYG method to join them together. There are plenty of videos on YouTube demonstrating this technique.



BORDERS
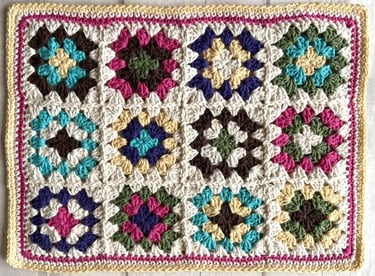
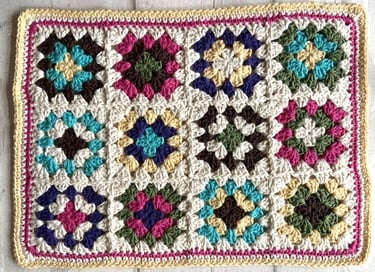
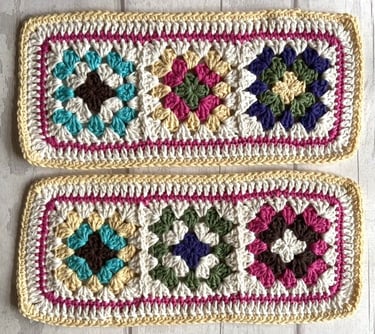
I put borders around all my panels so that they were the same size as the sides of hessian bag as follows:
Front and back panel borders
3 rounds of dc with 3xdc stitches in each corner stitches


Side Panels
1 round of dc with 3xdc stitches in each of the corner stitches
1 round of tr with (2tr 1ch 2tr) stitches in each of the corner stitches
1 round of dc with 3xdc stitches in each of the corner stitches

JOINING
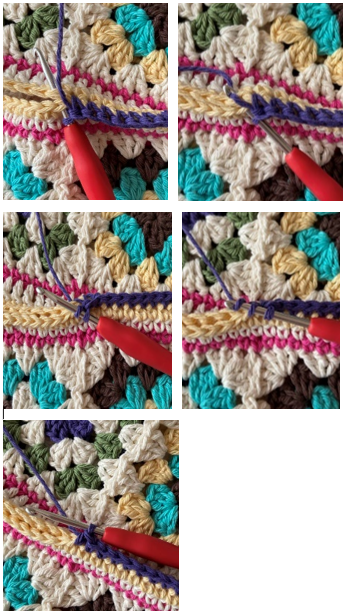
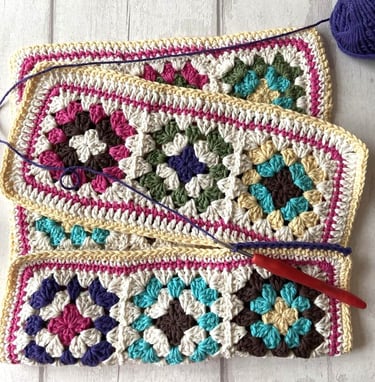
Join the two side panels and front and back panels together with right sides facing you using dc along each short side length with your choice of yarn colour and a 4mm hook.


BOTTOM PIECE
Count the number of stitches along the long edge of the front panel (the back panel should have the same number).
Using a 4mm hook and yarn colour of your choice, use the number of stitches you counted along your front panel (plus 2 stitches) to make a ch for the bottom piece of your bag.
My front and back panels were 58 stitches wide and so I chained 58 (+2).
Row 1 Starting in the 4th ch from the hook, work 1tr in each ch along (the 3ch at the beginning counts as a tr stitch). Ch 3 and turn.
Row 2 Starting in the 2nd stitch from the hook, 1tr in each st along (the 3ch at the beginning counts as a tr stitch). Ch3 and turn.
The ch3 at the beginning of the rows counts as a tr. Repeat row 2 until the piece is the same depth as the short width of the bag sides. Fasten off and weave in ends.
My bottom piece was 10 rows. I did 3 rows in brown, 4 rows in green and 3 rows in brown. I changed colours in the last pull through of the last stitch where I wanted the colour change to be. Click here for Colour Change at Row End


Join the bottom piece to one end of the joined side pieces. With right sides facing you using dc along each of the four side lengths with your choice of yarn colour and a 4mm hook. Join to the bottom of the front and back panels and the two side panels.
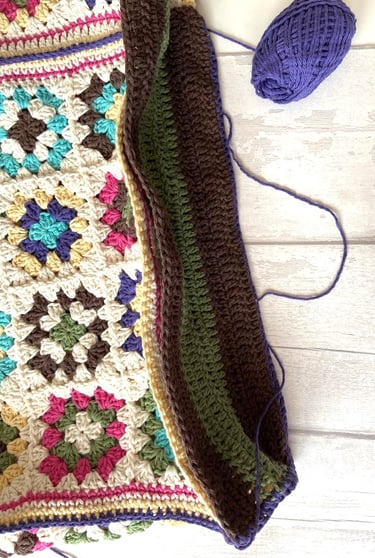

FINISHING
With the 4mm hook and your choice of yarn colour, attach yarn to any stitch in the top edge of the crochet fabric. Work 1dc in each stitch around the top edge. Sl-st join to the first stitch, fasten off, cut yarn and weave in ends.
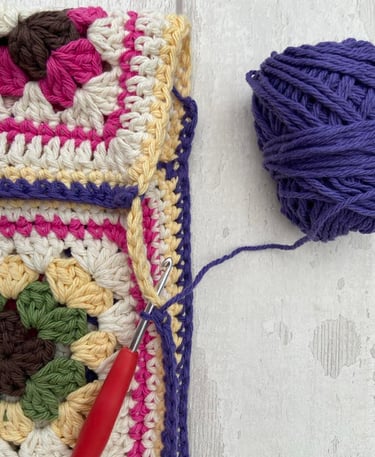

Slip the hessian bag inside the crochet fabric bag and use hot glue to secure the two together.
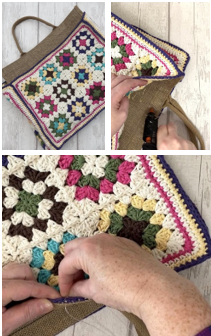

Finally, stitch around the top edge of the crochet fabric and the hessian bag in small stitches, using sewing thread and needle.
Your Granny Square Bag is complete! I hope you enjoyed this project and found the pattern easy to follow. I would love to see your finished bag, so share a picture on social media by tagging @scattiecrochet. If you have any questions or suggestions, please feel free to email me at scattiecrochet@yahoo.com
